Creating an invoice
Learn how to create invoices and send them with our step-by-step guide.
In this article:
Why use invoices
The amount due is calculated based on hourly rates per member or per project and excludes non-billable tasks. When your team reports time, the only thing you should do is to click the `Create invoice` button. The time in the invoice is marked as invoiced and doesn't appear in future invoices. Plus your team cannot accidentally change this time afterward.
Reports let you analyse the time spent for a specific project or client, understand the effectiveness and profitability and make more accurate estimates in the future.
Before creating an invoice
- 1
- Only the users with the admin role can see the 'Invoices' page, can issue invoices, and see the financial information associated with them in reports. In addition, as an admin, you should activate the 'Clients and 'Invoices' apps.
- 2
- You need to create a client in Everhour or connect and import clients from Xero, QuickBooks or FreshBooks;
- 3
- The client should have at least one billable project (by default new projects in Everhour are non-billable);
- 4
- You should have billable and uninvoiced time or expenses for the selected period;
An invoice with time, expenses, and fixed fees
Go to the Invoices page and click the 'Create Invoice' button.
Select the client, choose projects and period. Check Expenses checkbox to include them into the invoice along with time (for T&M projects).

When you have fixed-fee projects, you can't invoice particular period. The whole sum appears as your billable amount.

By clicking the 'Create' button, you will see the invoice editing form. The invoice draft will not be saved until you click the 'Save' button.
You can change or translate any label used in the invoice at the Preview step. For more details, please refer to our Invoice customization guide.

- Invoice number: the number starts from 1 and in the future will automatically be incremented for this client. The pattern can be changed.
- Data: you can always change the period and/or projects, i.e. update the invoice.
- Basic invoice info: Issue date, Due date, and Reference number;
- Grouping and row numbers: you can specify how you'd like to group data in line items for T&M projects, we remember your choice and apply it with the next client's invoice. Also, you can decide whether you want to display row numbers on the invoice and (un)check the 'Show row numbers' section;
- Invoice items: edit description, time, rate, amount for T&M projects and description with billable amount for fixed-fee projects. Add a discount (0% discount also), taxes (0% tax also possible), etc.
- Public notes: adding details and important comments. Support markdown format.
Invoices with fixed-fee projects do not have the option to group their amount, the line item is always the project name. If you want to invoice part of the fixed fee, you can change the number directly in your invoice draft.
Create a free-form invoice
If you need to send a quote or an estimate to your customer before you started any work, you can create a free-form (blank) invoice.
To do so, just leave options 'Time' and 'Expenses' unchecked. Your line items will be blank and you can enter free text in description, time, and amount there.

Please note that data from free-form invoices isn't available in reports.
Creating an invoice from a template
You can create an invoice template and use it for all or existing clients. Templates allow you to use another language in lines and put another information in notes, etc.

To create/ edit a template, go to the Invoices page > Menu button > Templates:

On the Templates window, you can create new templates, edit or delete the existing ones, or copy them to create a new template.
Important:
- You cannot delete all invoice templates, there needs to be at least 1 in your team;
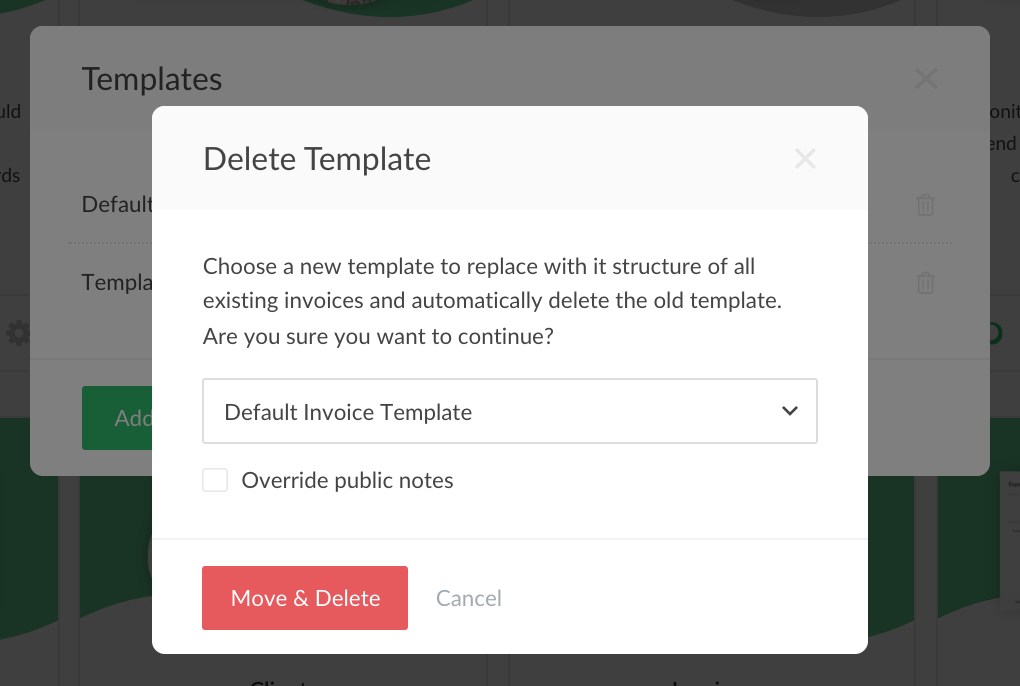
- When deleting a template that was used at least once, you will need to move its invoices to another template:
Adding payments to invoices
You can add full or partial payments to your invoice. To do that, click on the Add Payment button:

This opens up the “Add Payment” window where you can enter the amount of the payment. The total due amount will be shown by default, but you will also be able to add partial payments.
At the bottom of your invoices, you will see the invoice’s total amount and the sum of previous payments:

This data will also be available in the Amount column on the Invoices page. Payment history will be available at the bottom of each invoice.