Connecting with Jira Cloud
If you use Jira Cloud as a project management tool, you can easily integrate it with Everhour and start tracking time for all your Jira issues. No more tab switching.
In this article
How to setup
- 1
-
Sign up for an Everhour account. During the signup process, you’ll be asked to connect Jira with Everhour. Simply click the “Jira Software” button and follow the guided steps, Everhour will handle the setup automatically.

- 2
-
Install the Everhour add-on from the Atlassian Marketplace. This step must be completed by a Jira administrator.

- 3
-
Invite your team to Everhour. Jira users are not synced automatically. Only the users you explicitly invite to Everhour will be able to use the Everhour add-on inside Jira.

- 4
-
Install browser extension (optional). Install the Everhour browser extension to unlock additional controls and features that aren't possible within Jira's interface—like quick timesheet access, budget overview, and the ability to see and start timers directly from list/board views without opening issue details. The add-on works great on its own, but the extension adds extra convenience.


Replacing Jira’s native time tracking features
Jira shows its own native time-tracking fields by default, even if you install a third-party app. When both systems run in parallel, users see two different places to log time, which often leads to confusion, duplicate UI elements, and possible discrepancies if someone logs time in Jira instead of the app.
By switching the “Time tracking provider” to your third-party tool — in this case, Everhour — Jira hides its native interface and fully hands over time-tracking control to the app. This creates a clean, consistent experience where users log time only in one place and all data stays accurate and unified. You can enable this under Settings → Issues → Time tracking or by opening
% your domain% /secure/admin/TimeTrackingAdmin.jspa

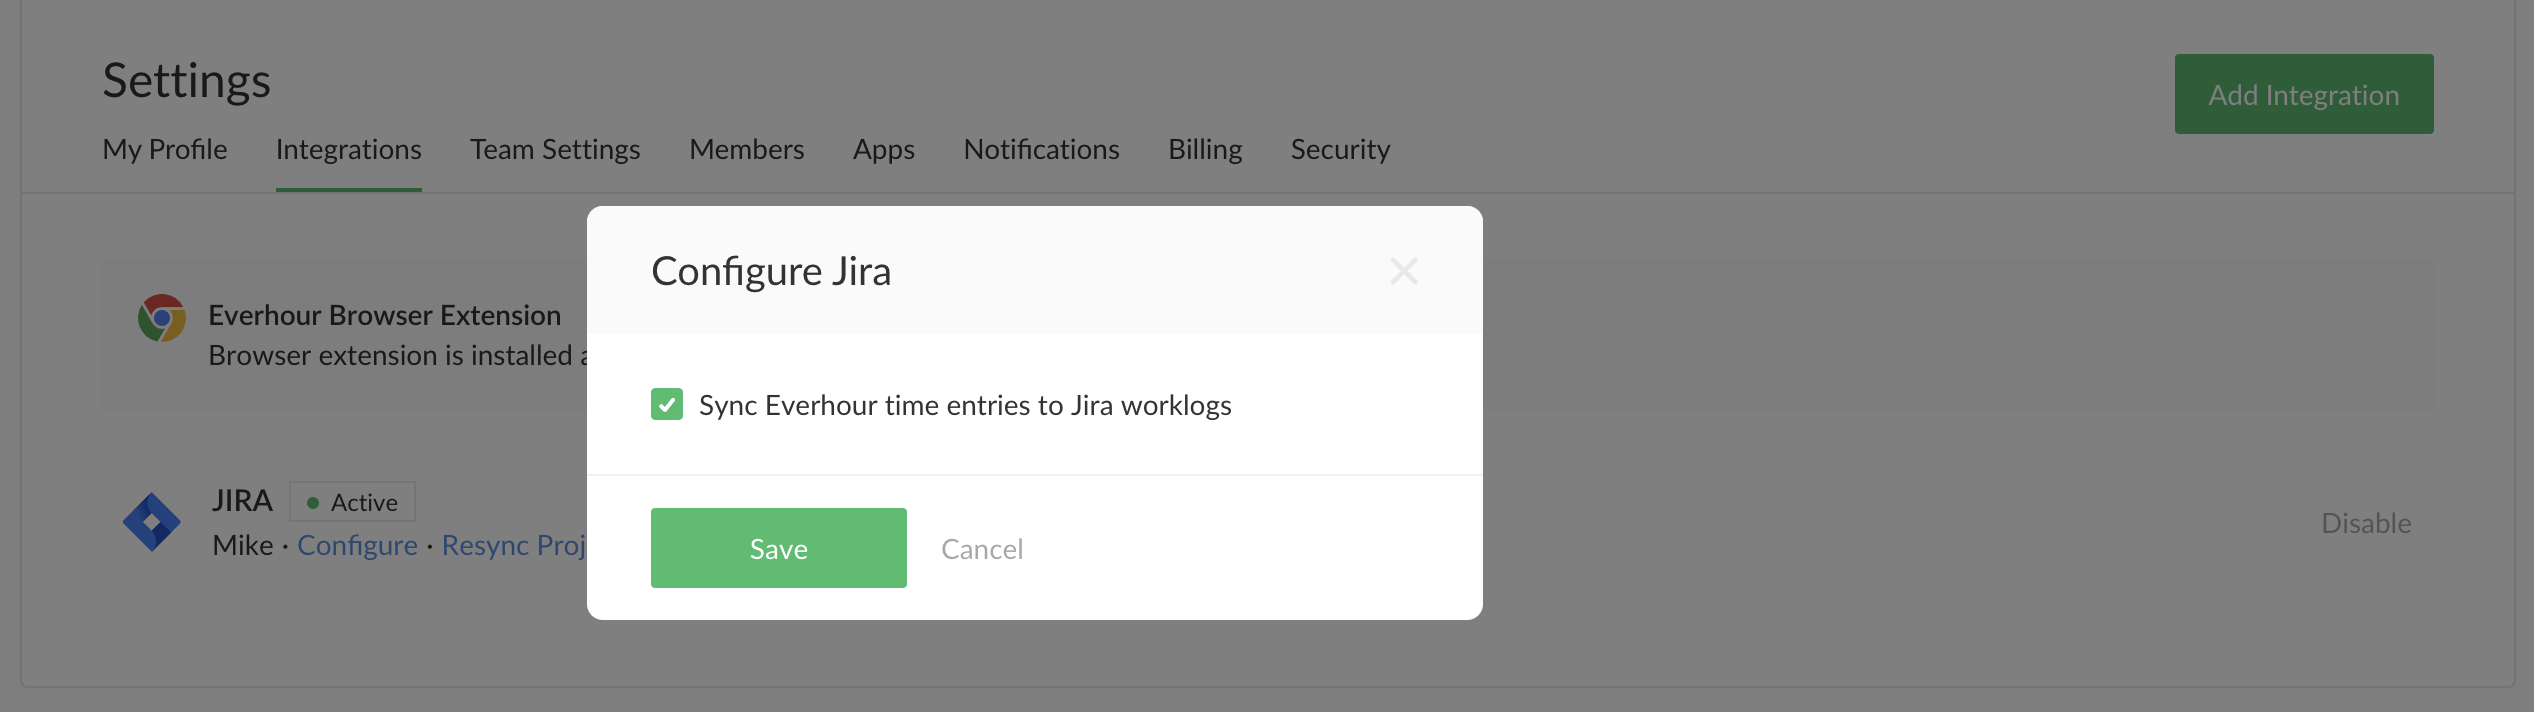
Sync Everhour time entries to Jira Work log
Switching the time-tracking provider does not mean that Jira stops storing worklog data. All time entries created through Everhour still go into Jira’s native worklog database. The only change is the UI. Users now log their time through Everhour’s add-on instead of Jira’s built-in fields. As a result, the experience becomes consistent, while Jira continues to display the same time-tracking data in its reports, issue history, and worklog views.
To do that, go to the Integrations page in Everhour and click "Configure" next to Jira. You'll see this link only after you install our jira add-on.
Please note that we do not sync your historical time records between Everhour and Jira, and we also do not sync any new time entered directly through Jira. Here are a few important details about how Everhour interacts with Jira’s work log:
-
If you log time in Everhour and later edit that work log entry in Jira, the update will appear in Everhour as well. It may take a short while—refreshing the page usually helps.
-
When time is entered in Everhour for a past date, Jira records it using the start-of-day time defined in your Everhour team settings.
Example: If today is Thursday at 12 PM and you add 1 hour for Monday, Jira will show that 1 hour was logged on Monday at 9 AM (or whatever your start-of-day time is).
-
When you enter time manually "just now," Jira calculates the start time by subtracting the logged duration from the current time.
Example: If you enter 2 hours at 2 PM, Jira will show the work log as starting at 12 PM.
-
Comment syncing from Everhour to Jira is limited to 1,000 characters, and text formatting or emojis are not synced.
-
Jira uses the timezone configured in your Jira account, while Everhour uses your computer's timezone. This may lead to slight timestamp differences between Jira and Everhour work logs.
Controls inside Jira
After successful integration, Everhour app supplements Jira interface with a number of features. This is how they look in the issue when you choose Jira time tracker for issues.

- Side bar: use our 'Time tracking' button to open your Everhour Time page and use weekly timesheet to log hours on Jira issues and tasks from other projects. Click on 'Time summary' (admins only) to see project time totals, budget usage history, expenses by the project, etc.
- Time tracking: Track hours with Everhour timer, add manually, edit time. If enabled on the integrations page (see section above), it syncs with Jira Time tracking field;
- Work log/Edit time/Time log: you can change and see the history of time changes into a task. Syncs with Jira work log if sync is enabled on the integrations page;
- Time remaining: Jira functionality that shows how much needs to be tracked to complete the estimate. Syncs with Everhour if enabled on the integrations page;
- Estimate: total time planned on a task, syncs with a Jira custom field called "Original Estimate".
Making reports with Jira data
There are a number of columns that show specific data coming from Jira. Open a report builder and select any of columns to display the data in your report.

- Project and task accordingly show the names of Jira projects and issues;
- Parent task column that can group your child tasks under the parent name (epic);
- Task number and Task status shows the task ID and whether it is open/closed, etc.;
- Tag shows the name of Jira labels;
- Any custom field can be used as a separate column;
Permissions
In general, we rely on Jira's permissions a lot. If in Jira the user has access to the task project, therefore, he can track the time in it. If you take away someone's access to the project in Jira, this user will no longer be able to track time into its tasks. Past history will remain in the reports of the team, but the user will lose it.
Configuring budgets, marking a task as non-billable, assigning a client to the project can only be done by admins. The admin in Everhour can see projects and tasks of all members. It does not matter if an admin has access to the same project in Jira. This is due to the fact that any admin should see the same totals in time reports and be able to configure projects billing and budgeting.
Regular users cannot track time into the archived project. Admins can do that, but only manually (timer is disabled). Thus, we indicate that the project is archived and make sure that no one tracks time accidentally.
Disconnecting
To disable integration, go to 'Integrations' page in Everhour account.
This option affects only your account, other team members are still able to track time. If the whole team disconnects Jira, no one can track new time in Jira, time history remains only in admin reports.
To remove all Everhour controls from Jira interface, delete our app.
How sync works
When you connect Jira, Everhour will automatically sync all your projects. It's currently not possible to make a granular sync, deciding what projects you wish to connect and what not.
Sync happens periodically and automatically so all new projects that you create in Jira will be added to your Everhour account. Everhour also updates the names of issues or projects if they were renamed in Jira. This way Everhour reports will always show the freshest data.
How to trigger instant sync:
- 1
-
Projects: If you’ve just created a new project in Jira or renamed an existing one and want the update to appear in Everhour right away, go to the Integrations page and manually trigger a project re-sync.

- 2
-
Tasks: If you’ve renamed an issue, added a tag, or moved it to a different section and want these changes to sync immediately, open the Projects page, select the project(s) where the updates occurred, and click “Resync Tasks.”


